> For the complete documentation index, see [llms.txt](https://docs.garden.io/llms.txt). Markdown versions of documentation pages are available by appending `.md` to page URLs; this page is available as [Markdown](https://docs.garden.io/getting-started/quickstart.md).
# Quickstart
Garden is a DevOps automation tool for developing and testing Kubernetes apps faster.
In this quickstart guide, we'll:
* Install Garden
* Build an example project and (optionally) deploy it to a local Kubernetes cluster
#### Requirements
* Docker running on the system
* A local Kubernetes installation (optional)
If you don't have Kubernetes installed, you can check out our guide on [installing local Kubernetes](/guides/install-local-kubernetes.md) or simply skip the deploy step below and instead go to step 4b.
#### Step 1 — Install Garden
Install the Garden CLI for your platform:
{% tabs %}
{% tab title="macOS" %}
```sh
brew install garden-io/garden/garden-cli
```
{% endtab %}
{% tab title="Linux" %}
```sh
curl -sL https://get.garden.io/install.sh | bash
```
{% endtab %}
{% tab title="Windows" %}
Open PowerShell as an administrator and run:
```powershell
Set-ExecutionPolicy Bypass -Scope Process -Force; iex ((New-Object System.Net.WebClient).DownloadString('https://raw.githubusercontent.com/garden-io/garden/master/support/install.ps1'))
```
We also recommend adding an exclusion folder for the `.garden` directory in your repository root to Windows Defender:
```powershell
Add-MpPreference -ExclusionPath "C:\Path\To\Your\Repo\.garden"
```
This will significantly speed up the first Garden build of large projects on Windows machines.
{% endtab %}
{% endtabs %}
For more detailed installation instructions, see our [Installation guide](/guides/installation.md).
#### Step 2 — Clone the example project
Next, we clone the example project from GitHub and change into the project directory:
```sh
git clone https://github.com/garden-io/quickstart-example.git
cd quickstart-example
```
#### Step 3 — Connect your project
Now we need to connect the project to the Garden Cloud backend. This is required to use features such as [team-wide caching](/features/team-caching.md) and the [Remote Container Builder](/features/remote-container-builder.md).
You connect the project via the login command like so:
```sh
garden login
```
You'll be asked to create an account if you haven't already. Once you've logged in an `organizationId` will be added to the project config. This is of course just an example project but in general you should check the Garden config file with the `organizationId` into your source control.
You can [learn more about connecting projects here](/guides/connecting-project.md).
#### Step 4a — Deploy the project to local Kubernetes
{% hint style="info" %}
If you don't have a local installation of Kubernetes you can skip this step and hop over to step 4b instead.
{% endhint %}
Now we can deploy the example project to our local Kubernetes cluster. We'll deploy the project in sync mode which enables live code syncing and starts the dev console:
```sh
garden deploy --sync
```
This will build all the containers in this project with the [Remote Container Builder](/features/remote-container-builder.md) and deploy them to your Kubernetes cluster. You can then visit the example project via [the port forward](http://localhost:9124) created by Garden. You can also see the build results in the [Builds UI](https://app.garden.io).
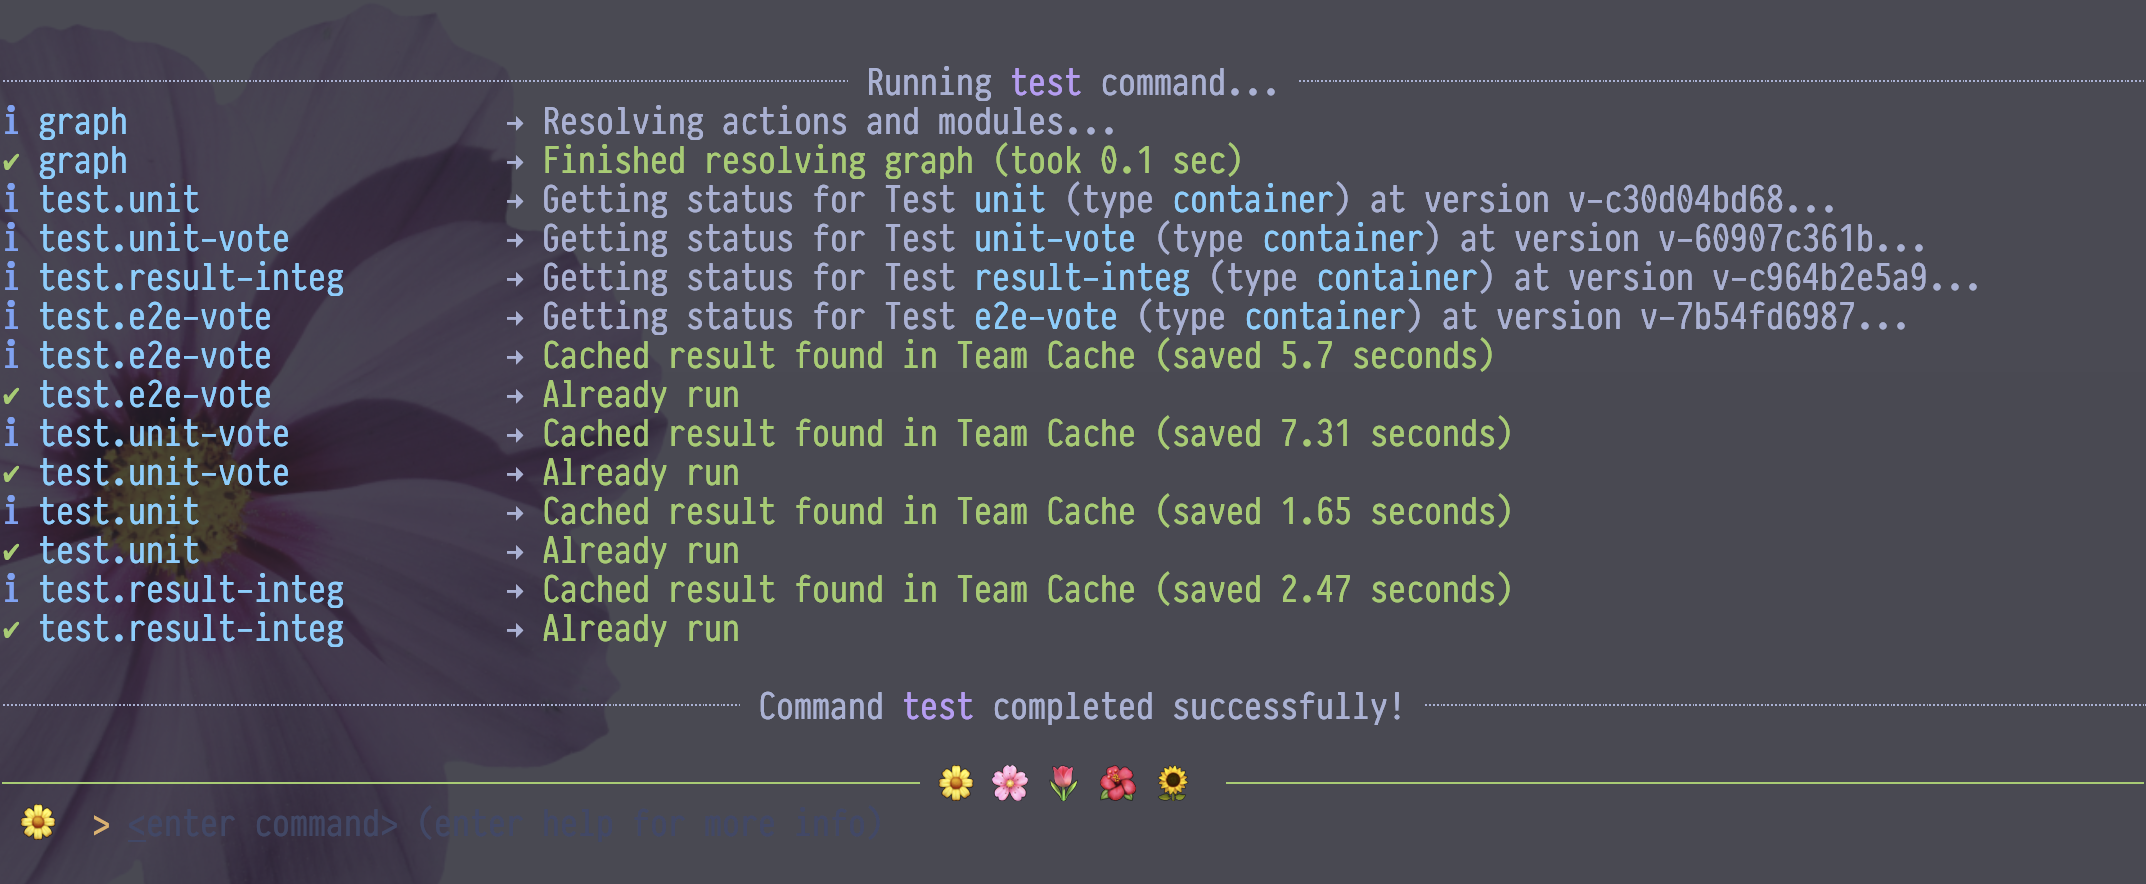
This example project also includes unit and integration tests. To run all tests in this project, type `test` in the dev console and hit enter (you can also run specific tests with e.g. `test unit` and `test integ`).
Once the tests pass, try running the same `test` command again. This time Garden should tell you all the tests have already passed at this version. It will also tell you that the container images are already built. That's Garden's smart caching in action and it can dramatically speed up CI pipelines and dev workflows.
Garden test caching
The project itself doubles as an interactive guide that walks you through some common Garden commands and workflows. You can open it via [the port forward](http://localhost:9124) created by Garden when you ran the `deploy` command with the `--sync` flag. We encourage you to give it a spin!
#### Step 4b — Build the project without Kubernetes
Even if you don't have Kubernetes you can still use the [Remote Container Builder](/features/remote-container-builder.md) to build the container images in this project.
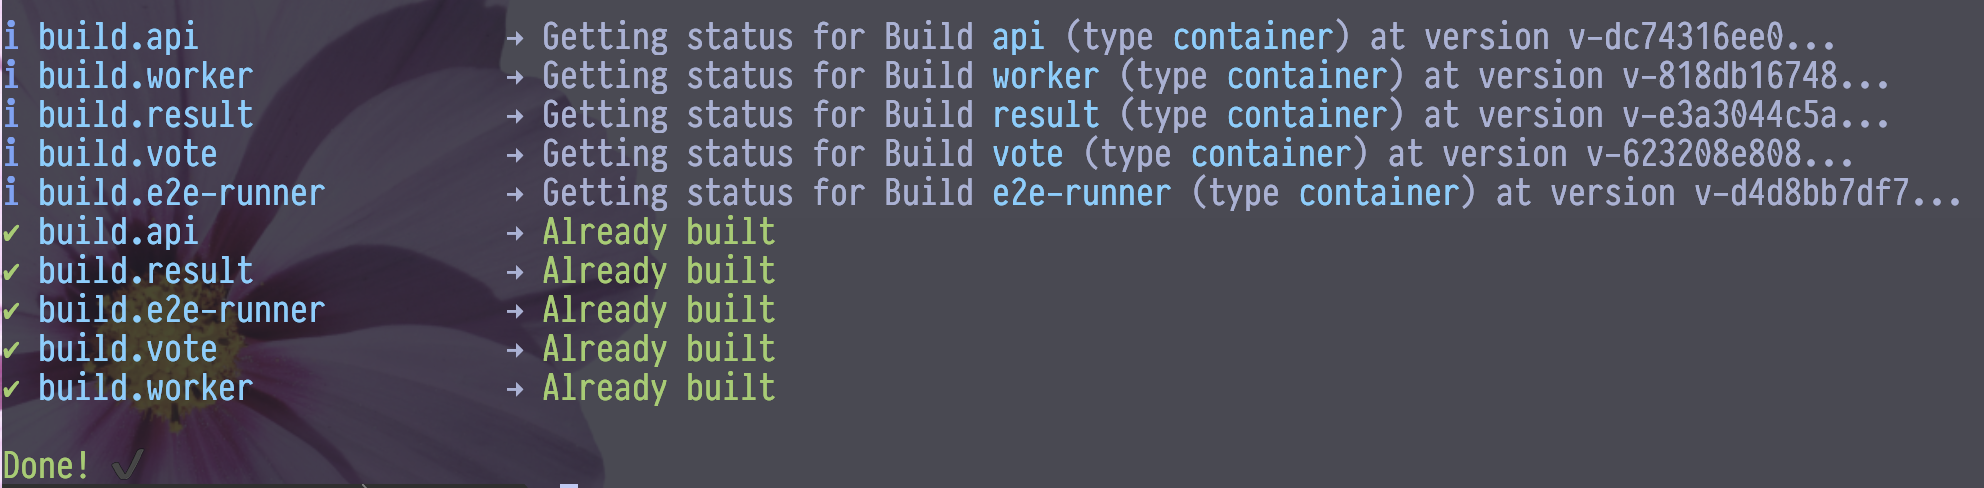
To build the project, run:
```
garden build --env no-k8s
```
Garden will use the remote container builder to build the images. You can view the results in the [Builds UI](https://app.garden.io).
If you now run the `garden build --env no-k8s` command again, you should see that all the images are already built. That's Garden's smart caching in action and it can dramatically speed up CI pipelines and dev workflows.
Garden build caching
### Next Steps
Now that you have Garden installed and seen its basic capabilities it's time to take the next steps.
Start by checking out the [Garden basics guide](/getting-started/basics.md) which covers the main concepts that you need to understand.
After that you can either go through [first project tutorial](/tutorials/your-first-project.md) which explains step-by-step how to add Garden to an existing project. Or you can check out the [Next Steps guide](/getting-started/next-steps.md) which gives you a more high level but still step-wise overview of how to adopt Garden and add it to your stack.
If you have any questions or feedback—or just want to say hi 🙂—we encourage you to use [Garden Discussion](https://github.com/garden-io/garden/discussions)!
### Troubleshooting
If you get an error saying `Cannot connect to the Docker daemon at /path/to/docker.sock. Is the docker daemon running?`, make sure you have Docker running on your system and try again.
If you bump into other issues, don't hesitate to open a [GitHub issue in the Garden repo](https://github.com/garden-io/garden/issues).
---
# Agent Instructions
This documentation is published with GitBook. GitBook is the documentation platform designed so that both humans and AI agents can read, navigate, and reason over technical content effectively. Learn more at gitbook.com.
## Querying This Documentation
If you need additional information that is not directly available in this page, you can query the documentation dynamically by asking a question.
Perform an HTTP GET request on the current page URL with the `ask` query parameter, and the optional `goal` query parameter:
```
GET https://docs.garden.io/getting-started/quickstart.md?ask=&goal=
```
`ask` is the immediate question: it should be specific, self-contained, and written in natural language.
`goal` is optional and describes the broader end goal you are ultimately trying to accomplish on behalf of the user. GitBook uses it to tailor the answer towards what is most useful for that goal.
The response will contain a direct answer to the question and relevant excerpts and sources from the documentation.
Use this mechanism when the answer is not explicitly present in the current page, you need clarification or additional context, or you want to retrieve related documentation sections.